
 Maintaining a beautiful and functional home and garden is essential for homeowners and renters alike. At Clark Real Estate, we believe that a well-maintained property not only enhances your living experience but also preserves the value of your investment. Here are some expert tips to keep your home and garden in top shape all year round.
1. Seasonal Maintenance Checks One of the best ways to keep your home in excellent condition is to perform regular seasonal maintenance checks. In the spring, inspect your roof for any winter damage, clean out gutters, and ensure your HVAC system is ready for the warmer months. Summer is an ideal time to check for any cracks in the foundation, inspect windows and doors for leaks, and service your lawn equipment. As fall approaches, clean your gutters again, check your heating system, and winterize your outdoor plumbing. Winter calls for regular snow removal from driveways and walkways, and ensuring your home is properly insulated to keep heating costs down. 2. Lawn and Garden Care A lush, green lawn and vibrant garden can significantly enhance your property's curb appeal. Regular mowing, watering, and fertilizing are key to maintaining a healthy lawn. Use a mulching mower to help return nutrients to the soil and reduce the need for chemical fertilizers. In your garden, choose native plants that are well-suited to your local climate and soil conditions. This not only makes gardening easier but also supports local wildlife. Regular weeding, pruning, and mulching can keep your garden looking its best. 3. Exterior Home Maintenance The exterior of your home is the first thing people see, so it's important to keep it in good condition. Regularly clean and inspect your siding, brickwork, and paint. Pressure washing can remove dirt and grime, making your home look fresh and well-kept. Check for any signs of damage, such as peeling paint or cracks in the siding, and address these issues promptly to prevent further deterioration. Additionally, ensure that your home's exterior lighting is functional and enhances the safety and beauty of your property. 4. Indoor Maintenance Tips Keeping the interior of your home well-maintained is equally important. Regularly check your plumbing for leaks and fix any issues immediately to prevent water damage. Clean and inspect your appliances to ensure they are functioning efficiently. It's also a good idea to test your smoke and carbon monoxide detectors monthly and replace batteries as needed. Declutter your living spaces to create a clean, organized environment that promotes relaxation and well-being. 5. Energy Efficiency Upgrades Improving your home's energy efficiency not only helps the environment but also reduces your utility bills. Consider upgrading to energy-efficient windows and doors, adding insulation to your attic and walls, and installing a programmable thermostat. LED lighting and energy-efficient appliances can also make a significant difference. Regularly servicing your HVAC system ensures it operates efficiently and effectively throughout the year. 6. Pest Control Pests can cause significant damage to your home and garden, so it's important to keep them at bay. Regularly inspect your property for signs of pests such as termites, ants, or rodents. Keep your home clean and free of food debris that can attract pests. In your garden, use natural pest control methods, such as introducing beneficial insects, to keep harmful pests under control. If you notice a pest problem, address it promptly with the help of a professional if needed. 7. Safety and Security A safe and secure home provides peace of mind for you and your family. Regularly inspect and maintain your home's security systems, including alarms, cameras, and locks. Ensure that your smoke and carbon monoxide detectors are working properly and have a fire extinguisher readily available. Outdoor lighting and well-maintained landscaping can also deter potential intruders and keep your property safe. 8. Regular Inspections Regular professional inspections can help identify potential issues before they become major problems. Schedule annual inspections for your roof, HVAC system, plumbing, and electrical systems. These inspections can save you money in the long run by catching small issues early and preventing costly repairs. At Clark Real Estate, we are committed to helping you maintain a beautiful and functional home and garden. By following these tips, you can ensure that your property remains in top condition, enhancing its value and your enjoyment of your living space. Whether you're a homeowner or a renter, regular maintenance is key to a safe, comfortable, and attractive home. For more personalized advice and professional property management services, don't hesitate to contact us. 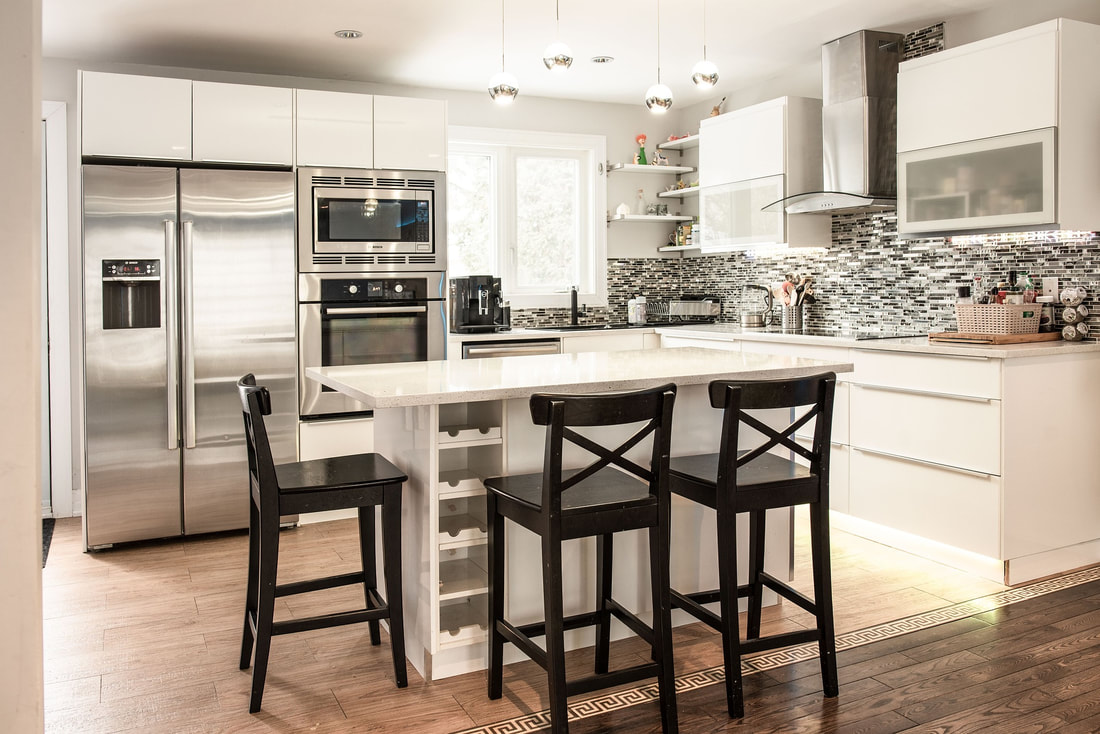 If you're thinking about renovating your home, there are a few things you should know before you get started. From understanding the different types of renovations to budgeting for your project, this guide from Clark Real Estate will give you an overview of what to expect when it comes to renovating your home.
Different Types of Home Renovations There are many different types of home renovations, from small cosmetic updates to major structural overhauls. Some common home renovation projects include:
Establishing a Timeline and Schedule Once you've decided on the scope of your project, it's time to establish a timeline and schedule. This will help you stay on track and ensure that your project is completed on time and within budget.Some factors to consider when creating your timeline and schedule include:
Budgeting for Your Renovation Next, you'll need to create a budget for your renovation. This will help you keep track of all the costs associated with your project and ensure that you don't go over budget. When budgeting for your renovation, be sure to factor in the cost of the following:
Software Used by Contractors These Days Contractors today use a variety of software applications to manage their projects, including project management software, accounting software, and CAD (computer-aided design) software. Certain specializations also have their own specialized software. All in all, by understanding which software applications your contractor is using, you can better communicate with them and stay up-to-date on the progress of your renovation. How to Find Capable, Trustworthy Contractors Once you've established a budget and timeline for your project, it's time to find capable, trustworthy contractors who can get the job done right. Here are some tips for finding reputable contractors:
Clearly Communicating Your Ideas One of the most important aspects of any home renovation is clear communication between you and your contractor. After all, they're the ones who will be responsible for bringing your vision to life! Make sure you take the time to sit down with them and clearly explain what it is you're looking for before work gets underway. Putting your ideas in writing is advisable, as well. If you like, you can start in Word, then save the files as PDFs so that they can be easily accessed on different devices. If you want to join various PDFs together, you can do so in seconds by selecting a PDF merger tool that you can use for free. Getting Permits Depending on the type and scope of your renovation, you may need to obtain certain building permits before work can begin. Your contractor should be able to advise you on which permits are required for your project. Adding a Home Office With more and more people working from home these days, it's no surprise that many homeowners are looking to add a dedicated home office space as part of their renovation plans. If this is something you're considering for your own home, be sure to factor in the cost of additional electrical outlets, internet hookups, and any other special features that may be required. The Benefits of a Home Warranty Finally, one last thing to consider when renovating your home is whether or not to purchase a home warranty. This type of insurance protects against unexpected repairs or replacements that may be needed after the completion of your renovation project. While not required, a home warranty can give you peace of mind knowing that your investment is protected. Now that you know more about what to expect when renovating your home, it's time to start planning YOUR dream renovation! Just remember: careful planning, clear communication, and staying within budget are key to ensuring that your project goes off without a hitch! Clark Real Estate offers a variety of property management services for landlords and tenants alike. If you have any questions, please let us know. Image via Pexels Not owning the property doesn't mean you can't give it your personal touch. Here's how to make your rental feel like home! 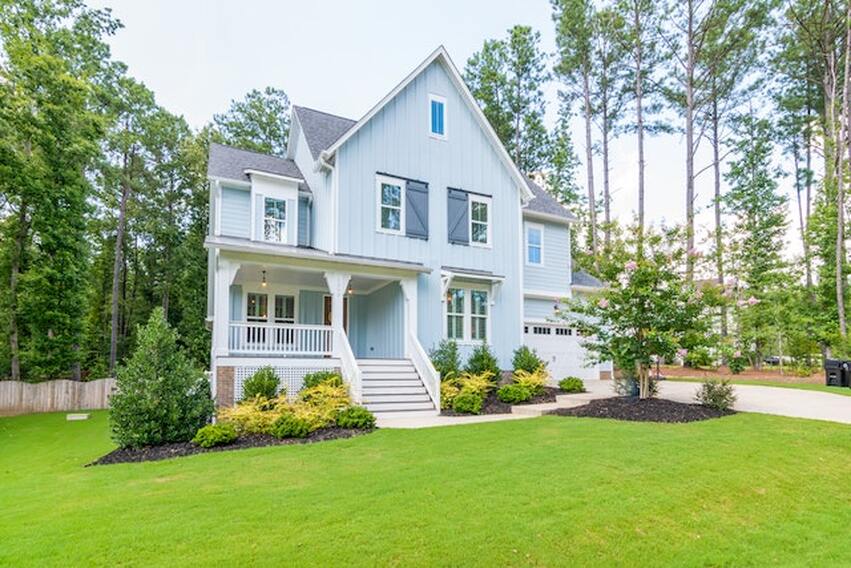 Even though you might not own a property, it's only natural to wish it feels yours while you live there. However, this can be challenging for renters in many ways, as renting comes with specific rules. For example, many landlords have a rule against nails on the walls for hanging artwork. That's why it's vital to ask your specific questions to your landlords before you choose the property, as you're the one who's going to be living here. For that reason, we create a list of ways to make your rental feel like home. Some of these ideas will help you feel more "at home" after a long day at work and simply help you enjoy the space more. Make your rental feel like home: Directions Renting a home or apartment can be an excellent option for many people as it gives you freedom and flexibility. Still, it can also feel temporary and lack a sense of belonging. However, for many people, renting is the only convenient option at the moment or the only one that's doable. So, if this is the option you're going for, and you wish to move to a new city and start fresh there, we say: Go on! Once you pack your belongings, find a team you can trust to transport your belongings safely, and say goodbye to your loved ones, you'll experience a mixture of feelings. In all of that, it's essential to be organized and stay on track. So, once you hire interstate movers for your California-Nevada move, it's time to focus on how you'll get a hold of your life in a new home and environment. Therefore, if you're looking to make your rental feel like home, there are several simple and cost-effective ways. Personal touch One of the most effective ways to make your rental feel like home is to add personal touches throughout the space. For example, hang pictures of your family and friends, put up artwork that you love, and display sentimental items like family heirlooms or vacation mementos. These personal touches will help make the space feel more like your own and add a sense of warmth and comfort. In addition to hanging pictures and artwork, there are many other ways to add personal touches to your rental. For example, consider adding throw pillows or blankets in colors or patterns you love or decorative accents like vases or candles. These small details can go a long way in making the space feel more like home. Also, magnetic frames are a good solution if landlords aren't keen on putting nails into walls. Creativity when it comes to storage space Maximizing storage is key to making any space feel more organized and efficient. If your rental lacks built-in storage, there are many ways to create additional storage solutions. Invest in furniture with built-in storage, like a coffee table with drawers or a bed with storage underneath. Alternatively, you can use creative solutions like under-the-bed organizers for this purpose. Another tip for maximizing storage is to declutter regularly and eliminate items you no longer need or use. This will help free up space and make the room more open and welcoming. Lighting is the key Good lighting can make a huge difference in how welcoming and comfortable a space feels. If your rental has harsh fluorescent lighting, consider replacing it with softer, warmer tones. You can also invest in floor or table lamps to create a more cozy atmosphere. In addition to replacing the light bulbs, you can also play around with the placement of your lighting to create a more inviting atmosphere. For example, you could add a dimmer switch to your living room to create a softer, more relaxed feel or use floor lamps to add a warm glow to a bedroom. Plants will make your rental feel like home instantly Adding a touch of greenery can bring life to any space and make it feel more welcoming. Choose low-maintenance plants like succulents or herbs that can thrive in your rental's lighting and temperature conditions. If you don't have a green thumb, consider getting a plant known for being easy to care for, like a snake plant or a peace lily.  Having plants in your rental will instantly give it a more homey feel. Plants add a touch of nature to your home and have many benefits. For instance, they can help to purify the air, reduce stress, and even improve your mood. So not only will they make your rental feel more like home, but they may also improve your overall well-being. Invest in comfy furnishings Having comfortable furnishings can make a big difference in how much you enjoy spending time at home. If your rental came furnished and you chose it based on its staging, you might not have much control over the furniture choices. However, you can still make the space more comfortable by adding throw pillows, blankets, or even a rug to make the furniture feel more inviting. If you have the option to bring in your furniture, consider investing in pieces that are both stylish and comfortable. A cozy couch can make a huge difference in how welcoming and relaxing your home feels. Have a home office If you're working from home, having a dedicated workspace is crucial. Set up a desk or table in a quiet corner of your rental and add personal touches like plants or artwork to make it feel more like your own. Setting up a home office can help increase productivity and create a separation between work and leisure time. So whether you're working on a laptop or a traditional desktop computer, it's important to have a comfortable and functional space to work.  A dedicated workspace will help you make your rental feel like home. Don't forget the outdoors If your rental has a balcony, patio, or yard, make the most of it by adding furniture and decor to create a comfortable outdoor living space. Consider investing in a small grill or fire pit to make the space more inviting and enjoyable. You could also add some potted plants or hanging baskets to bring a touch of nature to the area. If you don't have a lot of outdoor space, you can still create a welcoming area by adding some seating and a small table. This could be the perfect spot for enjoying a cup of coffee in the morning or relaxing with a book in the evening.  If your rental has even the smallest outdoor space, take the most out of it and make it your morning coffee sanctuary. The takeaway from how to make your rental feel like home
Overall, your wish to make your rental feel like home isn't impossible. There are many simple, cost-effective ways to make your rental feel like your own. By following some (or all) of our tips, you can turn your rental into a comfortable and welcoming space that pictures your personality and that you love spending time in. Photos used: Pexels Pexels Pexels Pexels Are you ready to create a perfect home office in your new residence? Here’s how you can do it in a few simple steps.  Whether you're just starting your own business or have been working from home for years, having a home office in your rental can make working from home more enjoyable. Whether you're renting an apartment or a house, these tips will help you get set up with the best possible working space.
Choose a good location Once you've decided on the type of space that will work best for your home office, it's time to find the perfect spot. There are many factors to consider when choosing a location for your home office.
It's all about the lighting When setting up your home office, it's all about the lighting. Once you find a new home and start furnishing it, you want to create an environment that is inviting and comfortable for you to work in. To do this, you need to keep in mind the following:
Get creative with storage solutions The first thing you should do is make sure your storage solutions are up to snuff. This can be challenging if you don't work from home full-time and just need the occasional space to work on some paperwork. But it doesn't have to be impossible. For example, if you have bookshelves at home already, consider using them as storage for your office supplies instead of in the living room where they usually go. It will save space and keep things organized. Another thing you should consider is using a small table in your living room. It would make an excellent surface for storing paperwork or other materials that are easy to reach. If neither of these options works for you, try hanging a shoe rack from an unused wall; this is especially helpful if your rental unit has limited closet space. Finally, if all else fails, plenty of wall-mounted shelves are available online that can make bare walls look like they were meant specifically as storage spaces! Invest in quality furniture When setting up your new office, it's crucial to invest in good quality furniture that will last. You want to be able to enjoy your space for a long time! Before buying furniture for your home office, consider the following:
Decorate with plants and other natural elements For all of these reasons, it's important to decorate with plants and other natural elements. Plants can help improve air quality, reduce stress, purify the air, and save money on heating and cooling bills. On top of that, they can also help you cut down on your energy bill by providing shade from the sun and a break from the wind. This is particularly useful if your office doesn't have much ventilation. The benefits of incorporating plants into your home office design don't stop there! They give off oxygen which helps keep us alert. And if you're a plant person like me, then it's nice having something green around too. Choose a neutral color scheme for your walls When renovating your new home, especially the home office, consider choosing a neutral color scheme for your walls. You want to choose a color that will go with anything and one you won't be tired of looking at years later. For example, some prefer bright colors like red or yellow in their home offices. Mainly because they feel more energized when they look at them. However, if these colors aren't your style or don't reflect your personality well enough, the room may not feel like yours. It's better to choose something neutral, like white or light gray, so it can complement any decorating scheme without being overpowering or distracting from other elements in the room. However, if you have time to plan when you move into your apartment space (or even tap into your creative side), consider painting one wall as an accent color. This way, it won't detract from anything else in the room but adds another dimension for visual interest! Final thoughts We hope that these tips have helped you get started on creating your dream home office. Remember, there's no right or wrong way to do it! As long as you take the time to think through what kind of space best suits your needs and how you want it decorated, then any mistakes along the way will be easy enough to fix. Most importantly, you enjoy working in this space so much that it feels like home, even when you're not at home. Photo via Unsplash Wondering what kind of floor is best for rental property? Read this guide on how to choose the right flooring for your rental property now. 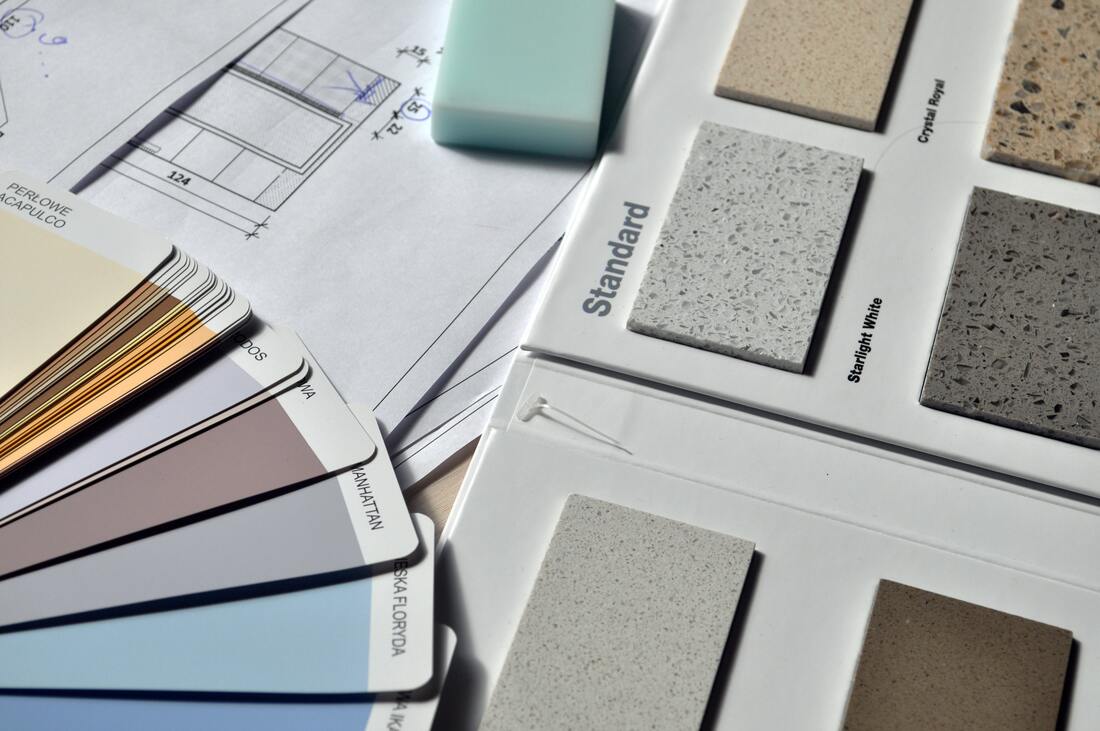 Choosing the flooring for a rental property can turn out to be a difficult choice. After all, picking out the right flooring for a rental is much different than choosing for your own home. Replacing the flooring in a rental property is an investment, and you want to ensure it pays off. As such, making the right choice is vital to your long-term success, and you should consider it carefully. There are a lot of factors that go into this choice, and you need to consider all of them. To help you out, we've put together a guide on how to choose the right flooring for your rental property. Choose based on location When trying to choose the right flooring for your rental property, you should consider the location. This is because certain types of flooring are better suited to different environments, and you can feel the difference. For example, if your property is in an area that is hot and humid, tile flooring is the best choice. Hardwood flooring is typically considered the best option; however, there are certain situations where other choices are better. As such, look into what every type of flooring offers. Pick the one with the most benefits in regard to the surface you will be laying it on. Little things like this are a big part of making your property more attractive to renters. Your main goal, after all, is to attract tenants to your property and always have someone staying there. So, using everything you can to make the property attractive should be a priority. 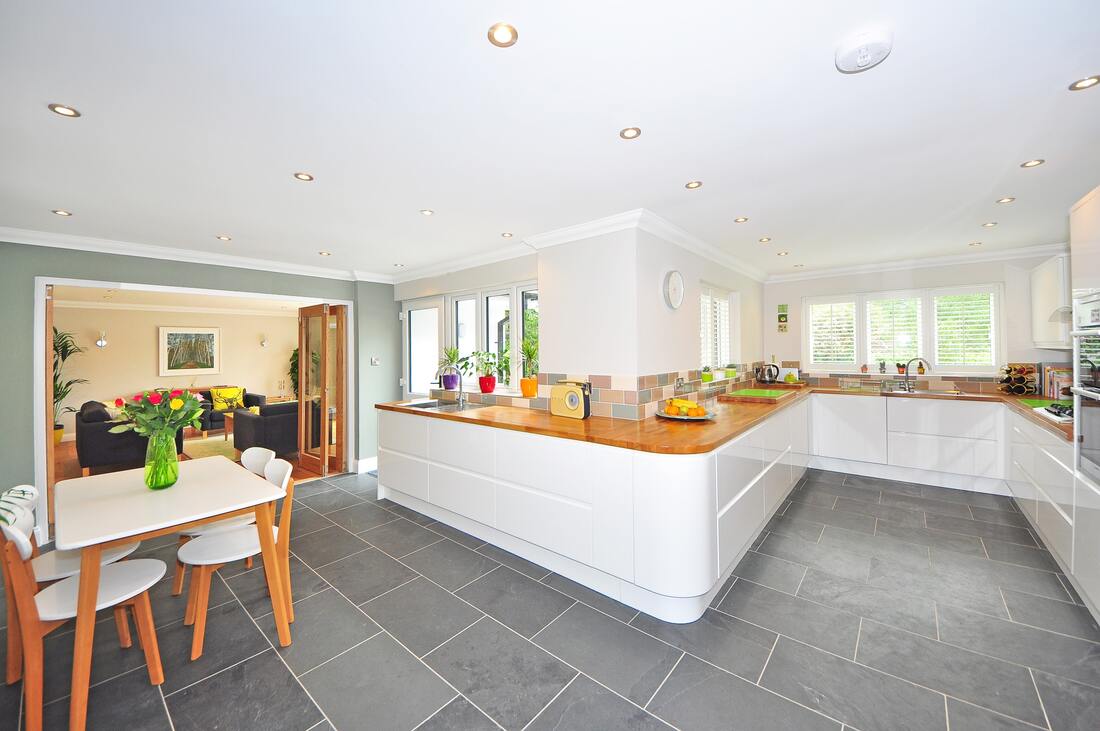 Choose based on target clientele When you want to choose the right flooring for a rental property, you have to consider what kind of clientele you want to attract. For example, if your property is a high-end rental, the tenants will expect lovely flooring. Luxurious flooring is required for high-end rentals; therefore, you should consider options such as hardwood flooring or other durable and fancy floors. On the flip side, if you're targeting tenants in a less fancy area, you can get away with cheaper flooring. Remember, you should only invest in your property as long as it's profitable. So, for less valuable properties, you're better off choosing low-maintenance flooring. Additionally, experts from 24/7 Logistics Services note that you should be very careful when moving new furniture into your properties. After all, you want to ensure that the property doesn't get damaged, and flooring gets damaged quite easily when furniture is transported onto the property. Think about being pet friendly Do you plan on allowing tenants with pets in your rental property? Well, you should know that this limits your options quite a bit. All in all, all flooring options that can trap shed hair are out of the question. Additionally, you shouldn't use flooring which is susceptible to stains. This leaves you with three choices: laminate, hardwood, and tile flooring. These three options are the best for pet-friendly properties since they don't trap shed hair and are very easy to clean. Laminate is a particularly good fit as it's also relatively low maintenance in the long run. However, when you are interested in keeping your property in good shape, you should also consider some tips for preventing water damage in your rental home. The less you worry about maintenance, the better in the long run. So, consider how you can protect your investment early on. 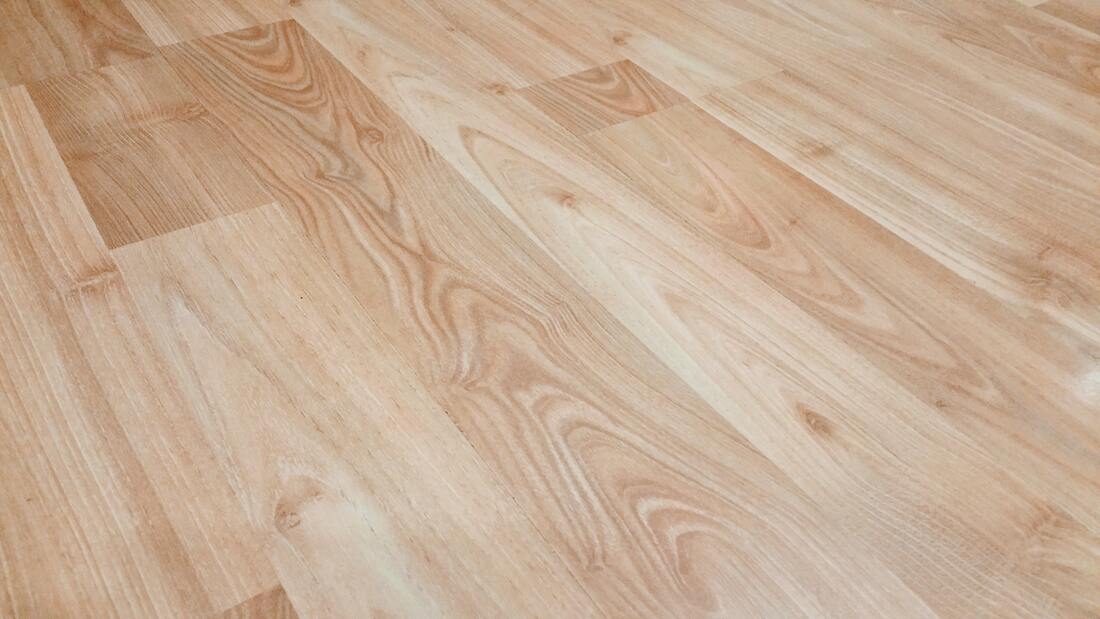 Invest in durable flooring Are tenants frequently changing in your property? Then you might want to consider durable flooring. This is because short-term tenants don't take as much care with the property as you might like. Unfortunately, this leaves the property at higher risk of damage, and damage to the floor is quite common. Additionally, if you're frequently changing the furniture in the property, durable flooring is also a good choice. The most durable floors you can find are laminate, linoleum, vinyl tiles, and vinyl sheets. Durable flooring is generally fairly low maintenance, so you can get more than one benefit from the investment. However, remember to think about where to put the furniture in the property while installing the new floor. You can also consider disassembling furniture to make it easier to move and avoid any possible damage to the furniture during transfer. Transferring your furniture while it is in pieces is also safer for the flooring. Consider low-maintenance flooring Low maintenance flooring generally has the highest return on investment rates when compared to other flooring types. This is because you don't have to put much effort into maintaining this type of flooring. We've already mentioned laminate, linoleum, vinyl tiles, and vinyl sheets as part of this category. However, for more (and some cheaper) options, you should consider engineered hardwood, carpet, cork, and floating wood tiles. The longer you can put off maintenance, the better, and these flooring options serve that purpose quite well. And when it comes to saving money, you should also consider ways to save water at your rental property. You'd be surprised how much of a difference saving water can make in your profits. So, do your research and implement multiple ways to save more money in the long run. 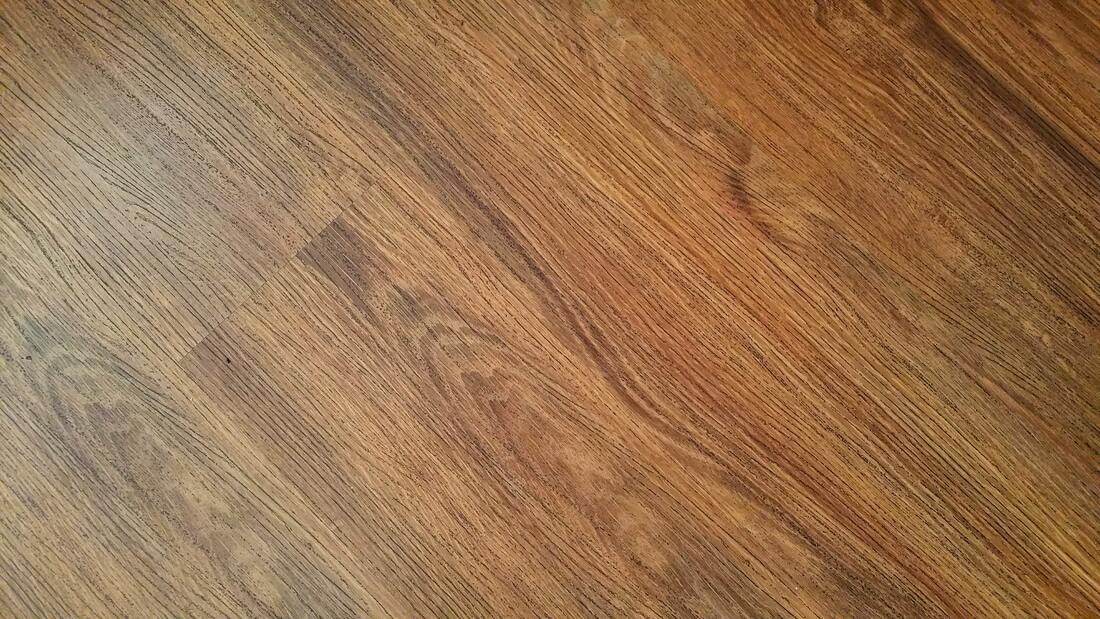 How to choose the right flooring for your rental property – wrap up
Choosing the right flooring option for your rental property can significantly affect how successful the property is overall. It might come as a surprise, but flooring plays a huge part in attracting tenants and as such, making the right choice is vital to your property's long-term success, especially if you change tenants frequently. The decision can come down to several factors, but what's important is that you do your research and consider every option carefully before coming to a final decision. After all, changing the flooring can take a while, so you should avoid having to do it often. We hope this guide on how to choose the right flooring for your rental property helps you come to a decision, and we wish you a good day. Photos via: Pexels Pexels Pexels Pexels  Concerned about water damage on your rental property? Read our list of 7 tips for preventing water damage in your rental home now! Water damage is a serious problem across many US homes, causing billions of dollars' worth of damage every year. The reason that water damage is so prevalent is that every home has running water. To make things worse, water leaks are very hard to detect before more extensive damage is already done. Untreated water leaks are especially harmful in rental properties, as they can seriously affect the investment and livelihood of the landlord and property manager. So, to help you avoid issues with your rental property, we have put together a list of 7 tips for preventing water damage in your rental home. 1. Inspect plumbing yearly or biannually The best way to deal with plumbing issues is to catch them before they become more severe. As such, inspections are essential to preventing water damage in your rental home. After all, most leaks and old pipes have warning signs before they burst and start flooding. So, the only way to miss them is to neglect regular inspections. Or, if you are doing regular inspections, they aren't thorough enough to spot the problem. Make sure to hire experts, or if you're doing the check yourself, make sure you know what you're looking for. And while we're on the topic, you should know the difference between normal wear and tear vs property damage. We recommend that you perform these checks yearly, but biannually can also work. 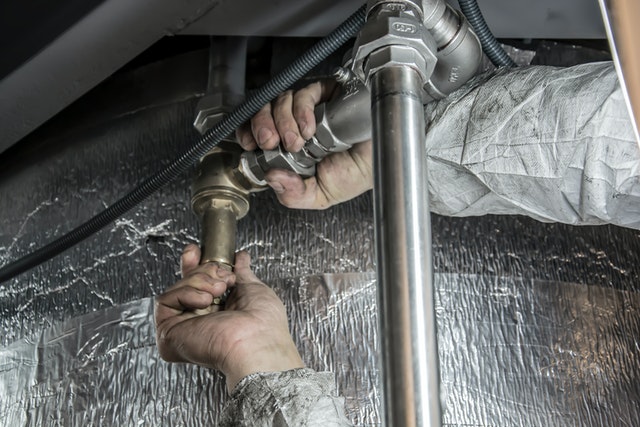 Regularly checking your property for plumbing issues is vital to preventing them. 2. Inspect the roof, chimney and attic It can be easy to focus solely on the water damage inside a home. However, water damage can just as easily come from outside, especially in states with a lot of rain. Regular checks of your roof, attic and chimney can reveal wear and tear, which can quickly evolve into more severe issues. You should do this check biannually; however, we recommend inspecting the outside of your home after every heavy rainfall or snow. Additionally, if you're someone who's moving into a rental property, experts from heartmoving.us recommend doing a check as soon as you move in to make sure. After all, you don't want the damage to be blamed on you, so prevention is in your best interest too. Landlords are advised to perform a move-in inspection and note all pre-existing damage on a checklist. 3. Regularly clean and maintain gutters Another common source of water damage is the home's gutters. After all, the point of gutters is to direct water away from the house, which is a good thing. However, when they're not cleaned or get damaged, gutters can have the exact opposite effect, and they can retain water. If water gets stuck in your gutters, it can cause severe damage to your roof in the long run. As such, after every heavy rainfall, or every few months, you should ensure the gutters are cleaned and well maintained. Remember, the most common issues of this problem are ice damming and gathered debris. As a tenant, you can easily do a check yourself, but be careful not to damage the gutters yourself while checking. As for property owners, remember that keeping the property well maintained is an excellent way to make your property more attractive to renters.  Keeping the gutters clean is very important for avoiding water damage. 4. Insulate the pipes Even if your tenants take excellent care of the pipes in your property, or if you give them guidelines on how to do it, problems can still happen. As such, installing pipe insulation is the best way of preventing water damage in your rental property. Sure, this isn't the cheapest thing to do, but the price of having the insulation installed is tiny compared to how much you'd have to pay to replace burst pipes. As for tenants, always be careful how you use water fixtures around the home. The tiniest mistake can lead to serious consequences. And if you're planning to move out of a rental property, especially when it comes to apartments, you want to make sure you leave everything spotless when moving out. Landlords should talk to their tenants and remind them that they will perform a move-out inspection, so everything needs to be in order. 5. Maintain basement drainage If your property has a basement, it's crucial to ensure no water gets stuck in it. It's easy for the basement to flood and for that to go completely unnoticed. However, fixing a basement flood isn't as easy as solving other problems around the house. So, making sure the drainage system is working properly is quite important. Regular checks on the drainage system, preferably every few months, should help you prevent water damage in the basement. Also, if the basement is used to store belongings, this becomes ever more important. The last thing you want is to go into your basement and find everything you kept there to be drenched. However, it would help if you also considered how a property manager can benefit from a storage solution.  If a basement floods, it can cause serious structural damage, so make sure the drainage is working properly. 6. Use a catch basin
Some properties can have issues with water gathering around the base. A good solution, in this case, is to install a catch basin, which will ensure no water gathers around the home's base. A catch basin will effectively redirect the water from the basement and foundation, thus preventing structural damage. 7. Install a sump pump An excellent way to make sure there's no water building up in your basement is to use a sump pump. Essentially, any water which might otherwise gather in the basement will drain into the sump pit, which you can later pump out a distance away from the house. However, keep in mind that sump pumps must also be maintained regularly to work properly. Closing thoughts Water damage is one of the common issues in properties all across the US. However, avoiding this kind of damage is very important for rental properties, as the damage can seriously lower the property's value and the landlord's investment. So, it's imperative to do your best to prevent it both as a tenant and a manager. Fortunately, most ways to do this are straightforward, only needing regular checks to ensure problems don't become serious or stop them outright. We hope this list of 7 tips for preventing water damage in your rental home helps you avoid water damage, and we wish you a great rest of your day. Photo Credits: Pexels Pexels Pexels Pexels  As a homeowner, it can be challenging to determine whether downsizing is right for you. However, by understanding what downsizing means and looking at the benefits, you can often make the best decision for yourself with relative ease.
If you’re trying to determine whether now is the right time to downsize, here’s what you need to know, courtesy of Clark Real Estate. What Is Downsizing? According to the Cambridge Dictionary, downsizing means moving “to a smaller home, usually because your home has become too large for you or as a way of saving money.” It’s a common activity among homeowners, particularly during significant life transitions. For example, some homeowners downsize after their children head to college or otherwise move out, often because they no longer need as much space. Others decide to downsize as they prepare to retire, allowing them to simplify their lives, cut costs, modernize, and reduce home maintenance-related burdens. Exactly how your new home differs from your last one can vary. In most cases, you’ll have less square footage when you downsize and might have fewer total rooms. The Benefits of Downsizing Decluttering Reduces Stress Unless you previously embraced a minimalist lifestyle, there’s a good chance you’ve currently got some clutter. When you downsize, paring back on your belongings is typically part of the equation. Not only does it make it a great excuse to declutter, but eliminating that extra stuff can reduce stress. You won’t feel overrun by your belongings, giving you peace of mind. Plus, there are plenty of simple approaches that make downsizing easier. You could try: Less Cleaning to Manage Another one of the major downsizing benefits is less cleaning. When your home is smaller (and there’s less clutter), your cleaning needs go down. You’ll have fewer surfaces to contend with and less overall square footage, letting you tackle all of your needs in less time. Since your home won’t have as much maintenance, you’ll have more time to spend on activities you enjoy. If you’ve regularly felt pressed for time, that alone can make downsizing worthwhile. Reinventing Yourself When you downsize, there’s nothing that says you have to stay in the same neighborhood. Instead, you could set your sights on a new location, giving you a chance to reinvent yourself after you move. In many ways, a move can be a fresh start. By coupling it with downsizing, you’ll get both benefits at the same time. Smaller Energy Bills When it comes to financial benefits, downsizing your home typically shrinks your energy bills. You’ll have less square footage to heat or cool, and that alone can make a big difference. Additionally, you might have fewer light fixtures or may be able to shift to smaller appliances that run more efficiently. As a result, your energy bill could go down quite a bit without you having to change your lifestyle. Making Money from Your Home Sale If your current home is larger than your new one will be, you have a money-making opportunity. Smaller houses typically cost less than their larger counterparts. As a result, there’s a decent chance you’ll earn a bit of profit on the sale that won’t have to go to your next property. The extra cash could help you accomplish a variety of goals. You could eliminate debt, making your budget easier to manage. Handling a large purchase, tackling some renovations, or taking a vacation might also be viable options. Try a home sale proceeds calculator if you aren’t sure how much money you could make by selling. That way, you can estimate the property’s value and your potential profit, giving you a decent idea of what to expect. Protect Your New Home When you downsize your home to save money, the last thing you want to happen is having to spend a lot of money out of pocket to fix several things breaking at once. You can protect yourself from this circumstance by finding the company with the best home warranty for your home. A solid home warranty will protect you in the event of an HVAC or plumbing issue, ensuring that it gets repaired quickly. All you’ll have to pay is the trade service fee. Read testimonials online to find the best provider for you. There are a host of financial benefits to downsizing your home. If it’s time for you to downsize, get started decluttering and organizing, sell your home at a profit, and protect your new home with a warranty. Image via Pexels 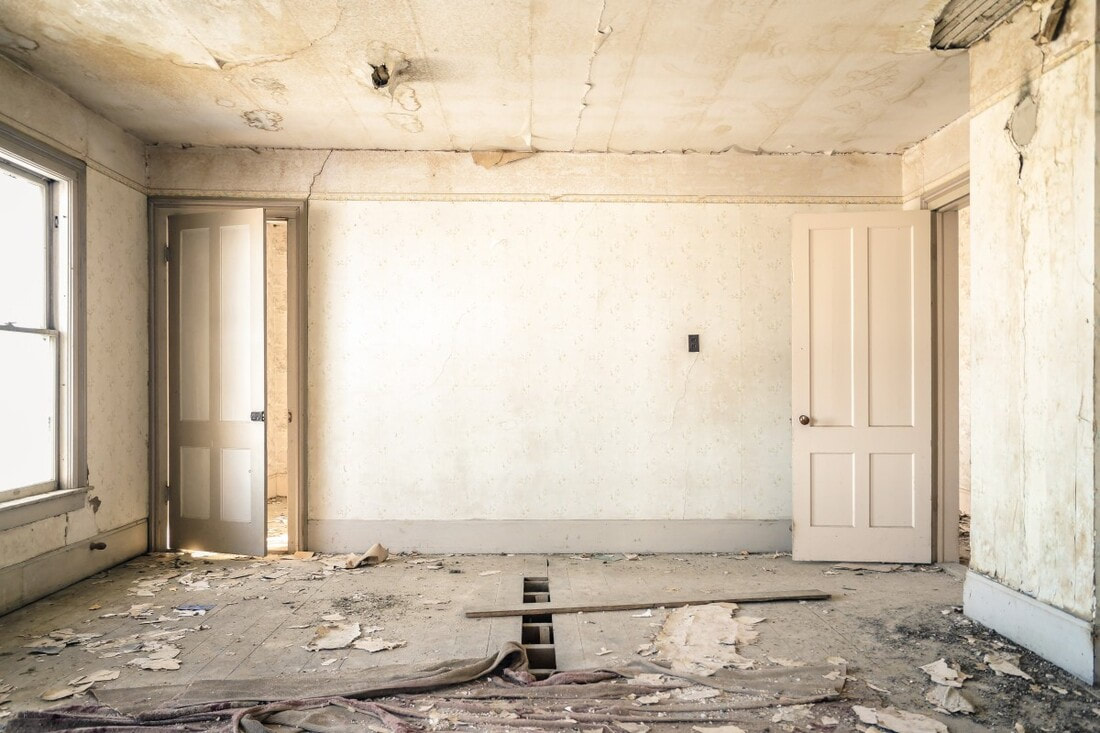 Photo via Pxhere If you are fortunate enough to find yourself in a position where you think you can afford to own property, you then have to deal with making the biggest and most complicated purchase of your life. For some, adding to the complication of a major renovation seems like madness. But for others, fixer-upper homes are the most achievable way to get the house of their dreams. If you have been considering joining the fixer-upper club, here’s what you’ll need to think about.
The Buying Process The first thing you need to do is determine your budget. In the case of a fixer-upper, this has to include both the price of the house and the renovation costs, but it is easier for you to think of them together for the time being. Good indicators to establish a budget include your annual income, money saved for a down payment, monthly spending, loan type, and current average APR. Don’t forget that there are plenty of hidden ongoing costs to owning a home, so you also need to take things like insurance, taxes, and maintenance into account. The next step for most homeowners is to get to know their local market and see what kind of home they can buy in the area with said budget. Nolo.com suggests that the best way to know how much to offer on a fixer-upper is to figure out the value of the home if it was fixed, calculating the cost of the work, and then subtracting one from the other. Once you find the fixer-upper of your dreams (and budget), there are a few additional steps you need to cover before making an offer. Get a full home inspection, which will highlight any repair work you may have missed during your visit, and re-adjust your offer accordingly. If a house you love has severe structural issues that would cost a fortune to repair, it may not be worth it. As you look into financing your purchase, research the types of loans that will work best for your situation. For example, if you’re a veteran with so-so credit and not a lot socked away, you are eligible for a VA loan, which can help when it comes to finding decent interest rates, plus there won’t be any mortgage insurance. On the other hand, if the home needs serious work, you can look into an FHA 203(k) loan. These loans provide funding for the home and the necessary renovations, in addition for funding that covers the time you can’t live in the home. The Renovation When it comes to renovating your new home, planning is the most important thing you can do. It may be tempting to throw yourself headfirst into the first DIY project you can think of, but this is not the most efficient way to proceed. Make a full list of everything that needs to be done, and sort tasks by priority. At the top, place anything that is necessary to make the house livable, such as electrical work, plumbing, or structural issues. Then address changes needed to make the house attractive. Finally, finishing decorative touches go last. A full renovation schedule is important, but it is by no means the only thing you need to consider. Real Homes has a detailed checklist of things you need to do before you start renovating, covering everything from securing the building site to learning about your home’s architectural features. And if you haven’t already, invest some cash into some quality power tools such as drills or saws to make those DIY projects a little easier. The Resale There is an accepted idea in society that your first house is a “starter home” and that you will eventually trade up to a bigger and better one. National statistics say the average first-time buyer stays in that house for 11 years before moving on to another home. However, there is also evidence that many first-time buyers, particularly young millennials, are skipping the starter home altogether. Instead, they are choosing to wait longer and put in more effort to buy a home that is right for them for the long haul. Whether you choose to re-sell your fixer-upper will ultimately depend on two factors: firstly, whether you bought the house with the long-term in mind, and secondly, how much value you have added through your renovations. Do bear in mind, however, that experts recommend living in a home for a minimum of five years before selling. Buying a fixer-upper for your first home doesn’t have to be a terrifying and intimidating prospect. As long as you are reasonable with your budget and expectations and do your homework, your fixer-upper can either end up being your dream home or a great first step on your way up the property ladder.  If you’re about to put your house on the market, you should first consider a few updates that will make your home more attractive to potential buyers. In order to maximize your profit, stay away from big-ticket items unless they’re absolutely necessary. They key is to focus on smaller, quick wins that will make a big difference. Here are a few ideas to get you started.
Inspection First, consider paying an inspector to examine your house and report on any issues he finds. You probably already know of a few minor things that need to be fixed, but a certified inspector can give you peace of mind by letting you know if the big things are in good shape. If he does find a major problem, you’ll get a jump start on determining your strategy for fixing it. To ensure a quality inspection, only hire an inspector with an InterNACHI (International Association of Certified Home Inspectors) membership. Unclutter Your House When you’re preparing to sell your home, here’s a idea to add to your checklist that won’t cost anything — get rid of the clutter in your house! uncluttering can make your home feel larger, cleaner, and airier, all of which make it more attractive to buyers. Below are a few quick tips:
After you’ve uncluttered, you might notice all that open space looks a little grungy. Guess what? It’s time to start cleaning. Scrub areas that haven’t seen the light of day in a while, and use a handheld vacuum to easily reach those tricky corners without having to rely on your heavy-duty cleaner. Handhelds are also good for quick clean-ups and are easily stored away once you’ve finished tackling whatever problem fell into your lap. Fix or Replace Leaky Faucets Prospective buyers will instantly notice and be turned off by leaky faucets in your home. If your faucet is newer and just has a leaky valve or connection, take a few minutes and fix it. If, however, your faucet is older and needs to be replaced, it’s not a difficult project and will noticeably improve your bathroom or kitchen. You’ll likely want to replace the supply lines under the sink at the same time as the faucet. One quick tip: You will have cut-off valves under the sink to turn the water off, but make sure you know where the whole-house cut-off valve is in case of emergency. This could save you some water damage! Spruce Up Your Landscape and Yard Improving your curb appeal will add to the attractiveness of your home as well. Take a weekend to knock out several of these improvements.
These updates are inexpensive, quick fixes that will help you obtain a higher price as you sell your home. Take a few days to implement them and you’ll be surprised how different your house feels. Prospective buyers will be impressed as well, and that’s your goal — so get to it!  Whether they’re itching for something to do during colder months, motivated by the occasional Saturday when warmer weather prevails, or inspired by a marathon of a favorite DIY show, there always seems to be at least one improvement project on every homeowner’s to-do list.
DIY Doubts If you count yourself among that cadre, it might be tempting to cut costs by tackling every task yourself. But, unless you are a veteran do-it-yourself homeowner who’s had a lot of experience with complex and costly renovations, there are probably some projects that should be left to the pros. For instance, most renovations experts say sanding floors requires a special touch that takes lots of practice to develop. So, even if you are able to rent the necessary equipment at a reasonable price, inexperience may lead to ugly mistakes that can be costly to fix. And, while it might be possible for a handy homeowner to complete simple electrical projects, like installing a dimmer switch or replacing a light fixture, the risk of shock and fire outweighs any cost savings for more complicated wiring projects, according to experts quoted in Architectural Digest. Likewise, they recommend that installing bulky or heavy items, like granite countertops, should be left to those who have the tools and techniques to do so without hurting themselves or the materials they are working with. Easy Upgrades Still, there are plenty of projects that even novice DIY homeowners can handle with a minimal investment of time and money. For instance, you could install new cabinet hardware and faucets in the kitchen and bath to give the rooms an almost instant cosmetic upgrade. A fresh coat of paint on walls, cabinets, or even a single wall offers much the same effect. And, while you’re at it, consider replacing dingy switch plates and outlet covers to create a clean look throughout your home. Projects to improve energy efficiency also offer an excellent return on investment, with many resulting in savings right away. For instance, adding weatherstripping around doors and windows and installing a programmable thermostat can help you control heating and cooling costs. Replacing conventional light bulbs with environmentally-friendly LED bulbs can cut energy usage and save you time and trouble over the long haul, because they don’t need to be replaced as often. Plus, your local utility company might offer rebates and discounts to help you cover the costs of some of these items. Staying Safe Even easy do-it-yourself tasks can present some risks and challenges. After all, you may need to mount a ladder to repaint a room or replace a light bulb. And, while a power drill can come in handy for everyday projects like installing a towel rack or hanging pictures on a wall, it can also create homeowner hazards. Before you begin any project, experts recommend that you keep these safety tips in mind: ●Wear the right clothes. Avoid wearing jewelry, loose clothing, or shirts with loose or long sleeves that could get caught in equipment. Be sure to wear goggles when you might be exposed to airborne debris, and use earplugs when operating noisy equipment. ●Prep your workspace. For safety’s sake, you need to have a clear work area. Make sure you remove all clutter from the floor and any other spaces you’ll be working in, such as the front or back yard. If you’re doing a major project that spans multiple rooms for longer than a week, you’d be wise to move any belongings that will be in the way to an inexpensive storage unit until the work is complete. ●Practice precautions when using power tools. For instance, you should never leave a power tool unattended while it is on. In fact, before you leave your work area, unplug any tools and make sure they are out of children’s reach. Follow the owner’s manuals and any warnings when using, caring for, and storing power tools to ensure they’ll work safely for years to come. ●Keep an eye on your surroundings. Be conscious of sharp objects, power tools, and other equipment in your workspace. Remain aware of other adults who enter your area, and keep children and pets out of the vicinity while you work. ●Mind your ladder. Read and follow instruction labels before using the ladder, and make sure you’re using the right ladder for the job. For instance, it’s important to select a ladder that’s tall enough for you to comfortably access the project area and that can bear the weight of you and your equipment, according to its stated weight limits. Finally, be sure to place the bottom one foot from the surface it’s leaning against for every four feet in ladder height. ●Have easy access to a first-aid kit, and make sure it is well stocked. You won’t want to treat serious injuries yourself, but scrapes, scratches, bumps, and bruises are common even during successful renovation projects. ●Mind your ladder. Read and follow instruction labels before using the ladder, and make sure you’re using the right ladder for the job. For instance, it’s important to select a ladder that’s tall enough for you to comfortably access the project area and that can bear the weight of you and your equipment, according to its stated weight limits. Finally, be sure to place the bottom one foot from the surface it’s leaning against for every four feet in ladder height. Following these suggestions about tasks you should leave to professionals, manageable DIY projects, and safety precautions will hopefully help keep both you and your home in good working order for a long time to come. |

Clark Real Estate
305 W. Moana Ste C Reno, NV 89509 (775) 828-3355 Reno Property Management
All
|
 RSS Feed

